


كيفية تصميم عمل نارى عظيم بالفوتوشوب How to Make Great Fireworks in Photoshop
How to Make Great Fireworks in Photoshop
كيفية تصميم عمل نارى عظيم بالفوتوشوب
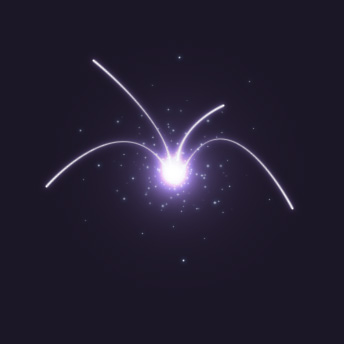
This tutorial will show you how to make some really great fireworks using Photoshop. It’s a great technique to use on celebration cards and posters, as well as graphics pertaining to holidays such as New Years and Independence Day.
You may have seen this effect a few days ago in Tutorial9′s New Year’s Announcement.

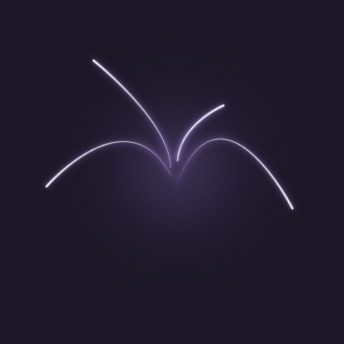
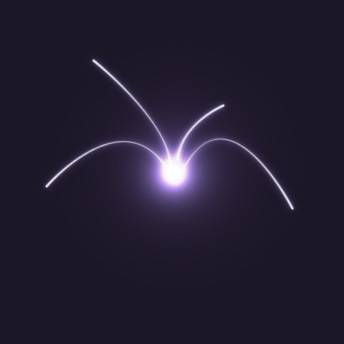
In this tutorial, I’ll be demonstrating how to create this effect.
Step 1 – The Background
Go ahead and create a new document, and select the Paint Bucket Tool.
Unless you plan on tweaking your fireworks color with Color Balance Layers (or by some other means) later on, the fireworks color will largely depend on what you choose your background color to be. We want a background color that is sort of dark, but also has some color value to it. I’ll be using a dark purple (#1c1727).
Fill your background layer with your chosen color.

Step 2 -The Burst (Stroke Paths)
If’ you’ve ever used Photoshop’s Stroke Path option before, this ought to be a cinch for you. For everyone else, we’ve got an easy guide to get you going.
Create a New Layer.
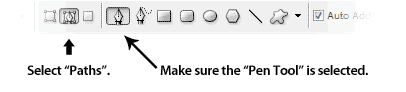
You’re going to need to select the Pen Tool from the tool bar, and in the options bar, you need to make sure that you’re working with Paths instead of Shape Layers.
If you’re new to the pen tool, you might need some time getting used to it. We’ve prepared a separate Pen Tool Basics Tutorial if you’d like to learn more about it!
On your document, left click somewhere near the center of the canvas to create a point with the pen tool.

Left click again up and to the right of this point to create a new point. This time, hold down the mouse button, and drag towards the bottom right to Curve your path.
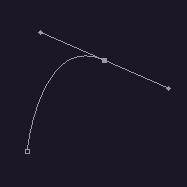
This will become the path which we will use to streak a beam of light across to make the “Burst Effect”.
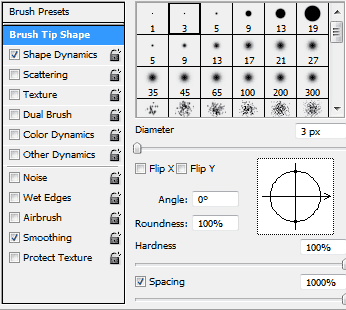
Select the Brush Tool. Select a Foreground Color of White. Set the Size of the brush to 3px (Hardness 100%).
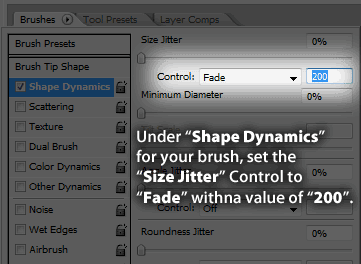
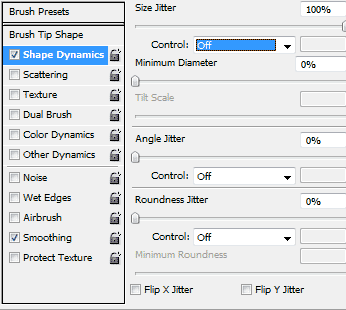
Under Shape Dynamics for your brush, set up a fade of around 200px.
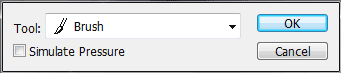
Go back to the Pen Tool. Right Click anywhere on the Canvas, and select Stroke Path. From the Box that pops up, make sure you select the Brush as the tool. This will tell Photoshop to use that brush you just set up to stroke the path you drew with the pen tool.
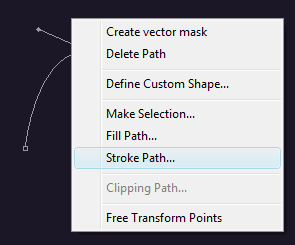
Once you have stroked your path, hit Esc Twice to make the Path line disappear.

Repeat this step several times until you have a few similar lines. Remember to always start your path from the outside going in, as the fade will begin from the first point.

Step 3 – Burst Blending Options
We need to touch up our burst effect a bit by adding some blending options to our burst layer. Right Click the Layer, and select Blending Options. Add the following Drop Shadow, and Outer Glow.
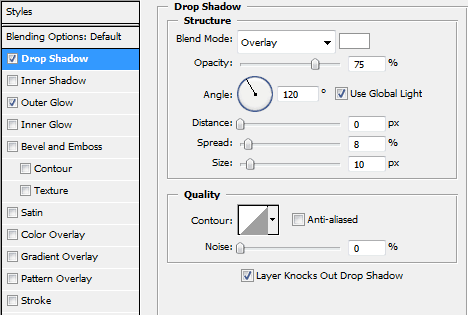
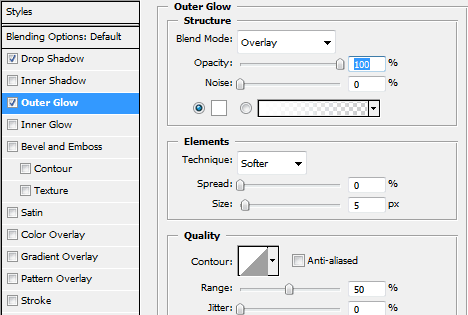
This will add a slight glowing effect to your burst streaks.

Step 4 – Ambiance Effects
Create a new Layer, and place it underneath your burst streaks layer.
Select the Brush Tool, select a default round brush (to override your earlier modifications to the brush tool), and then set the hardness to 0% and the size to somewhere around 200px. Set the Foreground Color to white. Click once to near the center of your streaks.
Set this layers Blending Mode to Overlay.
Create a new Layer above the streaks now. Using a smaller brush (50-100px, hardness still at 0%, or very soft), create a small circle at the center of the streaks again, where they all start to converge. Set this layers Blending Mode to Overlay. Repeat this a few times (you should end up with 3-4 layers).
Step 5 – Adding the Sparks
Select the Brush Tool once more, and set it up as follows (We are setting up a “Glitter”, “Sparkle”, “Fairy Dust” brush, so you may already have the idea on how to set this up).
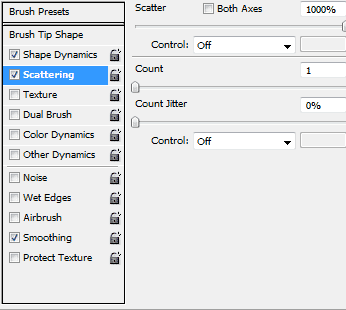
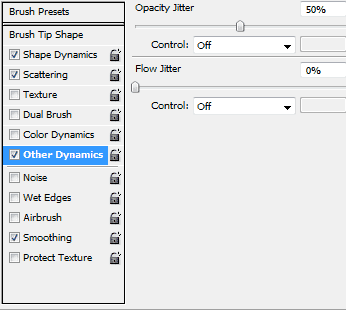
Now that you have your brush set up (which you may want to save for later use), Create a new Layer on top of all your previous layers, and brush in some sparks for your firework. Try to concentrate mostly around the center area, easing up on the sparks as you go outwards.

I usually like to add an Outer Glow at this point in the Blending options of this new layer. It lets me add some spark ambiance, as well as add some extra color to the firework.
Your firework should look pretty good by now!
Final Remarks
The fireworks in this tutorial hardly aim to replicate the look of a real world firework, but from an illustration perspective, they capture the elements of fireworks in a fun, creative manner.
To go a step further, you may want to add some Color Balance layers to add some colorful effects to your fireworks. You could also play with depth of field effects to give more depth to larger scenes.
Feel free to download our Fireworks Example PSD to see how we went about doing things!


الاشتراك في:
تعليقات الرسالة (Atom)


إرسال تعليق
قم بالتعليق تفيد وتستفيد