


لعمل كاب بيسبول ثلاثى الابعاد بالفوتوشوب Design a Realistic 3D Baseball Cap in Photoshop
Design a Realistic 3D Baseball Cap in Photoshop
لعمل كاب بيسبول ثلاثى الابعاد بالفوتوشوب
Step 1: Create the shape
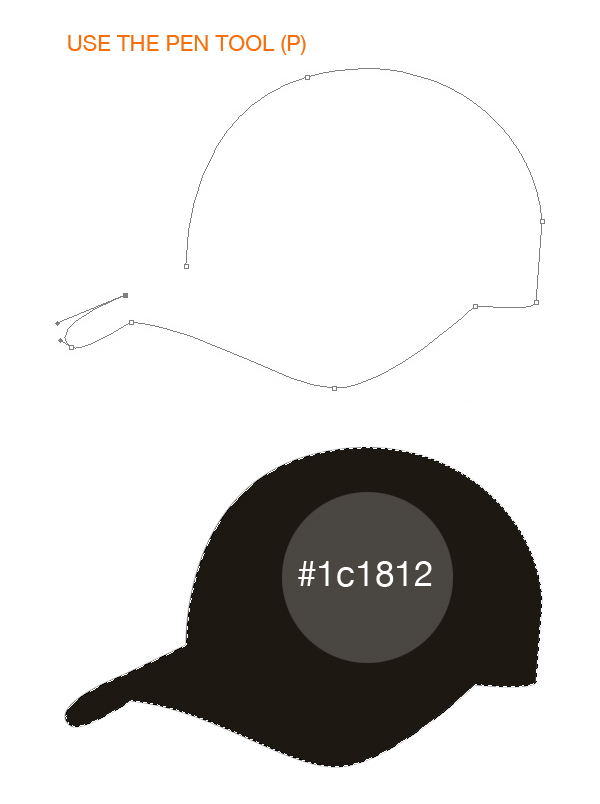
Create a new document in Photoshop and fill it with white (#FFFFFF). Create a new layer and use the Pen Tool (P) to create the shape of the cap (you can use an image of a cap as reference for this, or use the outline shown below). After that, press Command+Enter to transform the path into a selection. Then fill it with the color #1c1812.
Step 2: Define shapes
It’s time to define some parts of the cap. Use the Burn Tool (O) for adding some shadows to the cap (shown below) and then use the Pen Tool (P) to create two lines (#413a2f).
Need Help Stroking Paths?
You can learn how to stroke paths using the pen tool and the brush tool in our photoshop tutorial on creating fireworks.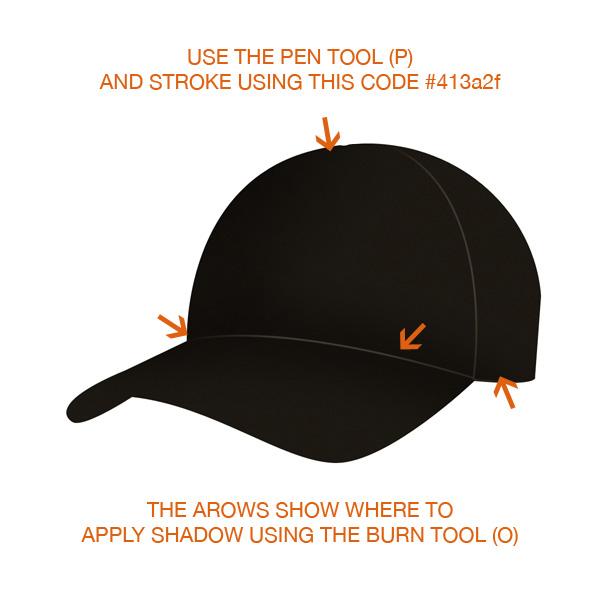
Step 3: Create the Texture
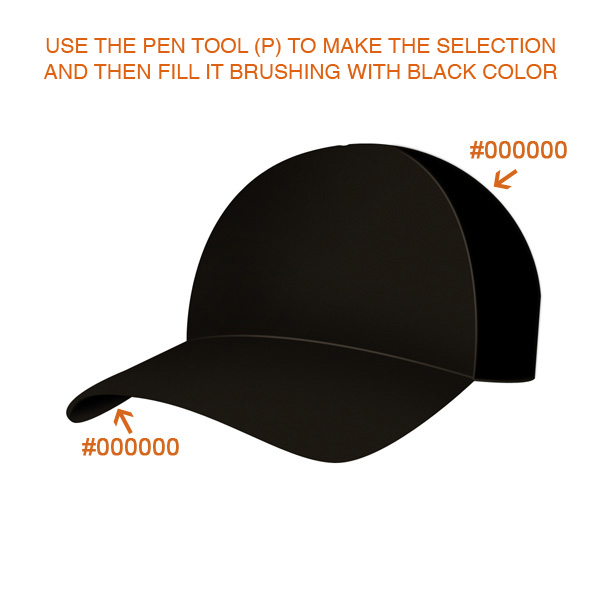
The rear part of the cap must be darker. Create a selection on the back of the hat, and use the Brush Tool (B) to fill the selection with a black color on a new layer.
Step 4
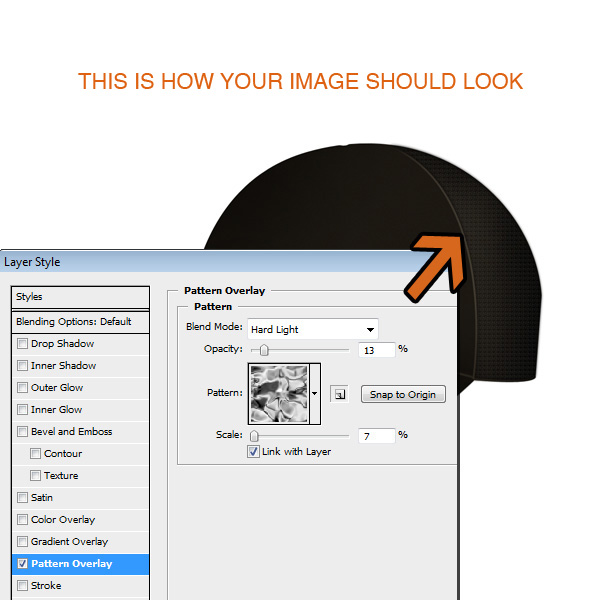
Right-click on the layer with the rear part of the cap and select Blending Options. Then go to Pattern Overlay and add the below settings.
Blend Mode: Hard Light
Scale: 7%
Opacity: 13%
Blend Mode: Hard Light
Scale: 7%
Opacity: 13%
Step 5
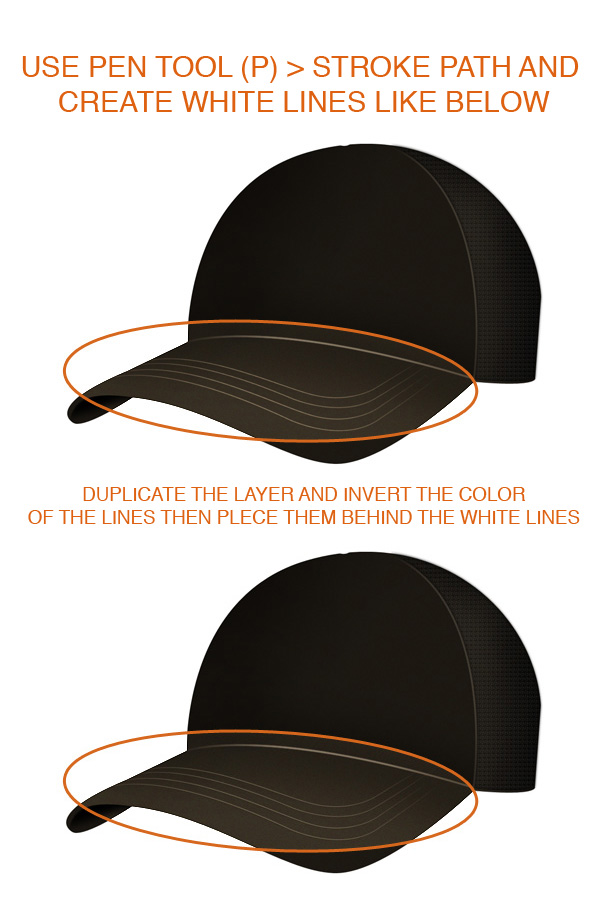
The seams of the visor are created with the Pen Tool (P). Create each seam on a separate layer by drawing the line with the pen tool, stroking with a thin hard brush, and then erasing the edges with a large soft eraser. Select these layers with the seams, and Merge Layers.
Duplicate them, invert their color (Ctrl+I) and place the black seams layer behind the other ones. This gives it a bevel effect.
Step 6
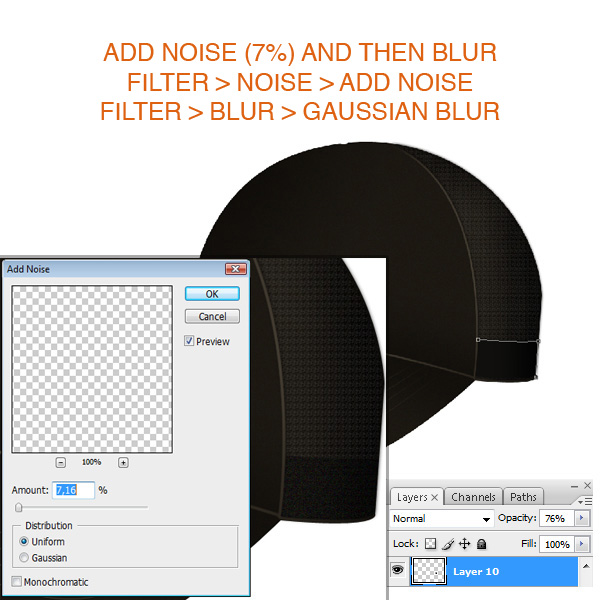
Create a new layer. Again use the Pen Tool (P) to create a shape like below and fill the selection with black. Then add noise to the selection (Filter > Noise > Add Noise | Keep it below 10%), and keep the Opacity of the layer to 75%.
Step 7
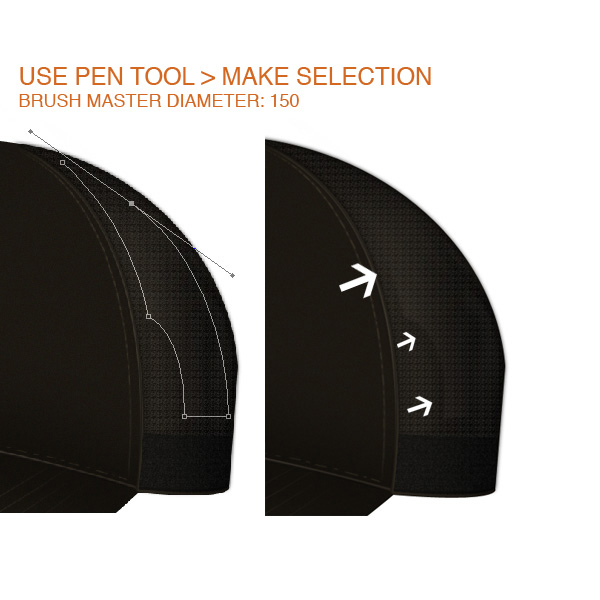
Create another layer and build a shape like below using the Pen Tool (P). Next thing you’ll have to do is to add some light, to make the rear side of the cap look more transparent (as if light is fading through from the other side). Use the Brush Tool (B) with white color and add some smooth light.
Step 8: Add logo
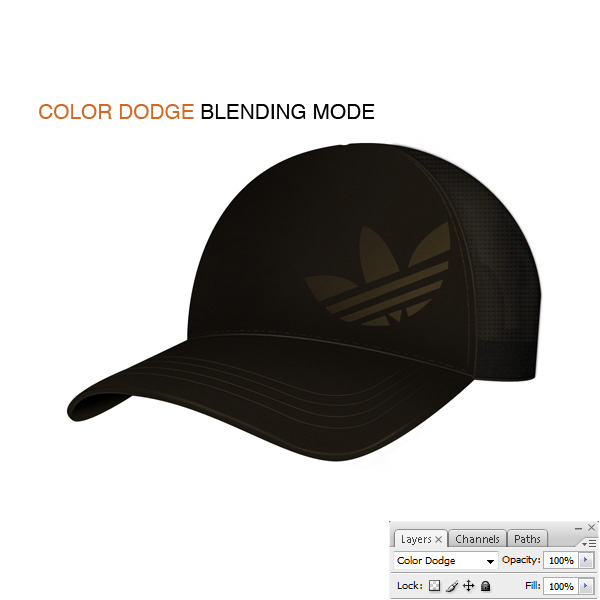
To give it an unique look you can add a brand or some unique design elements of your own. I used #7b7452 and then set the layer to Color Dodge.

Step 9: Details
To create the shape of the deeper lines in the cap, use the Pen Tool (P) to create shape selections, add lights and shadows using the Burn and Dodge Tools. Smudge the highlights and shadows to give them a softer look.

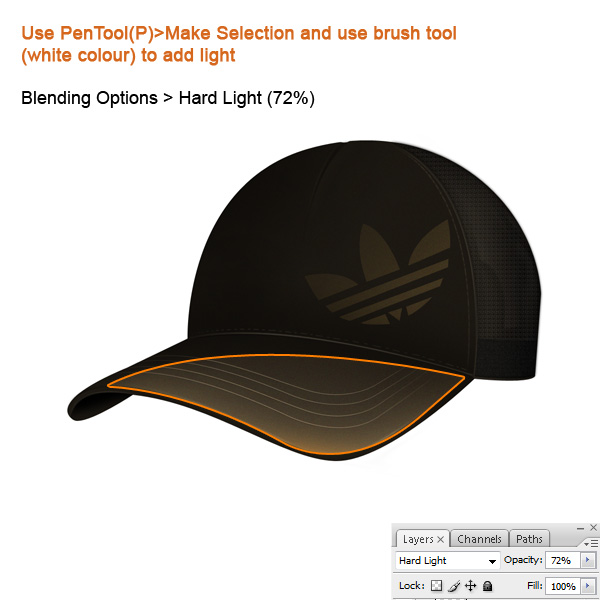
Step 10: Light
You must add some light on the visor, so make a selection and use large white brush to fill in the selection. Then select the Hard Light blending mode and decrease the opacity if needed.
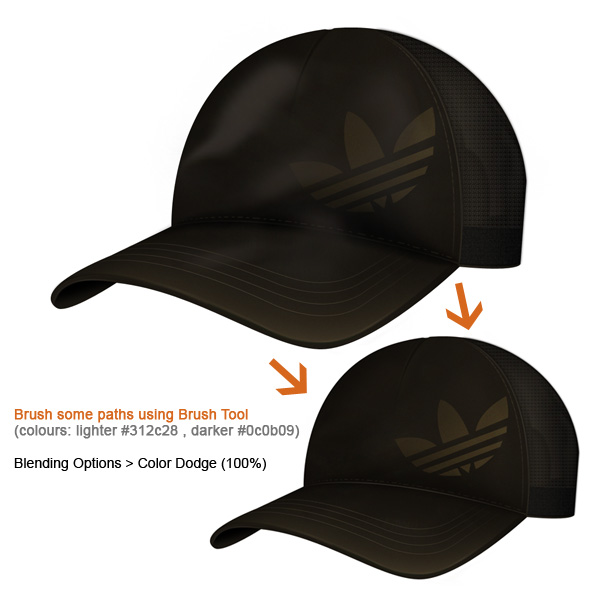
Step 11: Realistic Texture
The material looks a bit cartoonish and smooth, so we need to brush some spots with different colors (darker/lighter). You can smudge them (or give them different Filter>Blur>Motion Blur effects) to make them look more realistic.
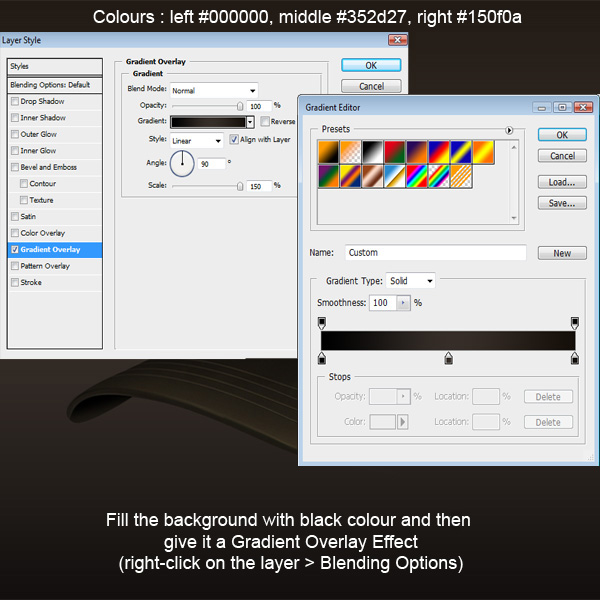
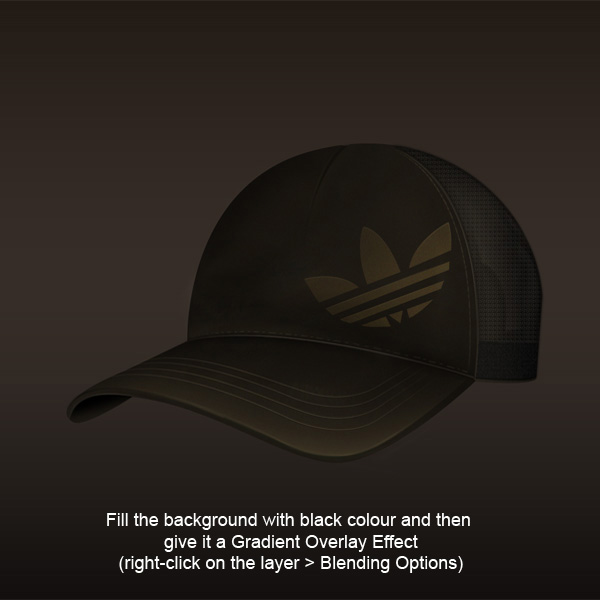
Step 12: Background
The cap is finished. Now you must create the background.
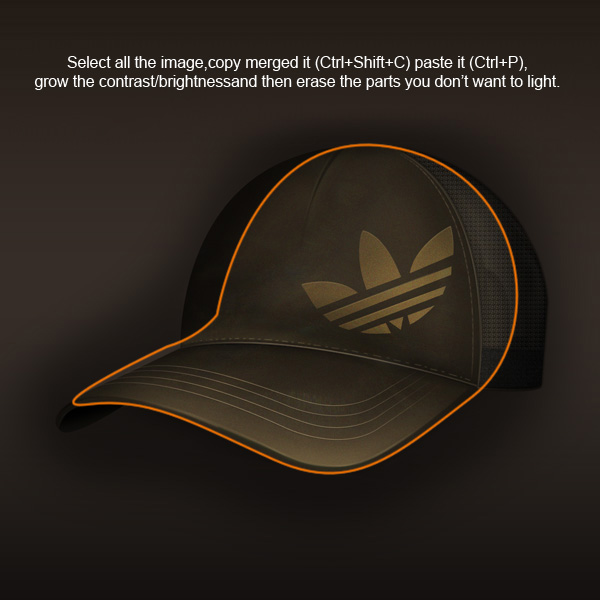
Step 13: Light
To make it more obvious and shiny, we must modify the contrast and the brightness. Select all the hat layers and merge them onto a new layer (Ctrl + Alt + E). Adjust the Contrast and Brightness (Image > Adjustments > Brightness and Contrast) until the hat pops out from the background significantly.
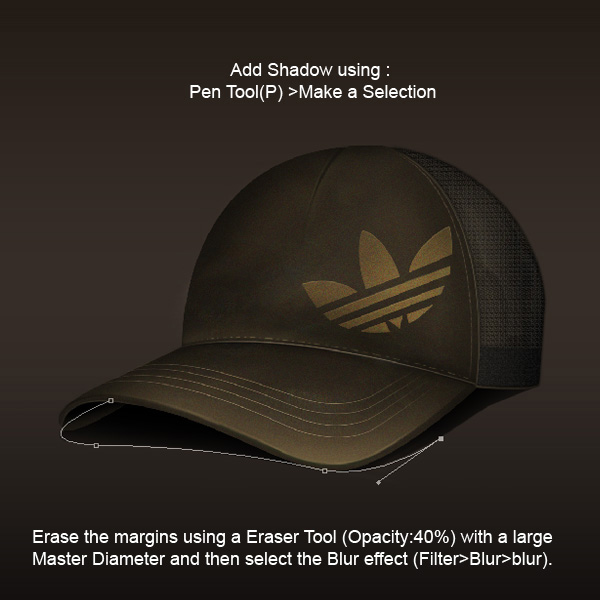
Step 14: Shadow
The cap looks like it is floating so we must add a shadow.
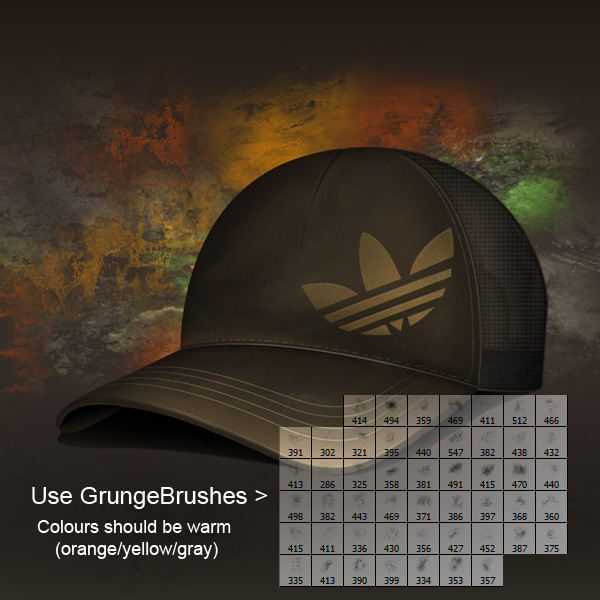
Step 15: Background
Create a new layer (ctrl+shift+n) and place it behind the cap layers. After that use some grunge brushes (like these) create a nice background using various colors.
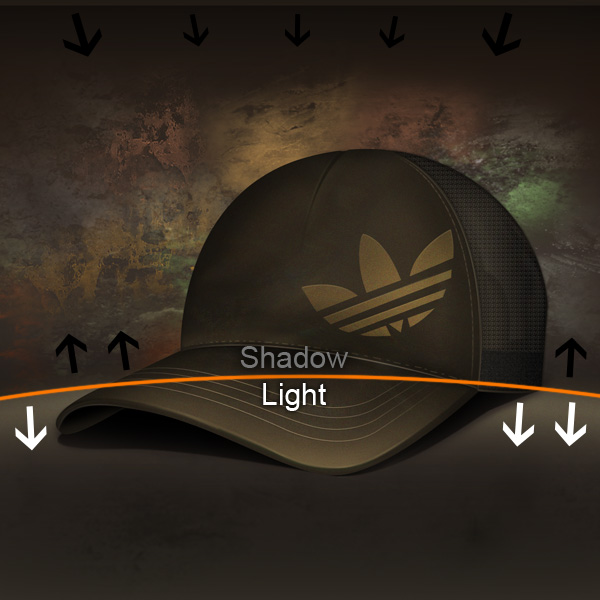
Step 16: Background
The final step of this chop is to add light on the bottom and shadow to the top to create the space where the cap is placed.
Use PenTool(P) to make the selection and using a large soft brush create the platform for the cap.
Conclusion
Try to improvise as much as you can when you are creating the design of the cap. It’s not necessary to use all the same colors, or create a grungy background! Enjoy, and feel free to download the free PSD for reference!

واتمنى ان اجد تصميماتكم المماثله على الجروب والا ااسف لعدم اتمام التصاميم

الاشتراك في:
تعليقات الرسالة (Atom)


15 سبتمبر 2010 في 1:53 م
ما شاء الله تصميم رائع